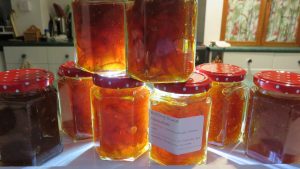
Marmalade
I’ve been developing this recipe over the last couple of years, looking for a result that is as fresh and tangy as possible to do justice to the fruit. The secret is to add the juice last, have good organisation and allow enough time. There are three main steps:
- Juicing and then simmering the oranges.
- Slicing the oranges and making the marmalade.
- Potting up.
Ingredients:
2 kg (14) Seville oranges.
500g (4) lemons.
1875g white granulated sugar.
Method:
Stage 1.
- Scrub the oranges and lemons, discard any stalks and the little hard pieces on the bottom of the fruit.
- Cut the fruit in half and juice. Set aside the pulp and pips from the juicer. Weigh the juice.
- Place the fruit halves in the preserving pan, weigh down with a heatproof plate and just cover with water. Simmer for 90 minutes to about 2 hours until the fruit is soft but not breaking up. Allow the fruit and cooking water to cool.
Stage 2.
- Remove the fruit from the cooking water and, using fingers or a spoon, scrape out any remaining pieces of orange segment “skins” left inside the fruit halves and set aside with the pulp and pips. Slice the orange halves (finely or chunky as you wish).
- Add all the pulp and pips to the reserved cooking water in the pan and gently simmer for 10 minutes. Cool and strain, discarding the pulp and pips while setting aside the cooking water.
Stage 3.
- Calculate the weight of the reserved cooking water needed: the weight is 11875 minus the weight of the fruit juice (see 1 above).
- Place the required amount of the cooking water plus the sliced fruit in the clean preserving pan. Bring to a gentle simmer then add the sugar.
- Place clean jars on a tray in the oven on the lowest heat.
- Stir the contents of the pan to ensure that the sugar is fully dissolved and then add the fruit juice.
- Continue heating the pan on medium heat, stirring from time to time to ensure that the strongly bubbling contents aren’t sticking. It is likely to take more than 30 minutes to reach the setting point (see below).
- Once the marmalade has reached a set, switch off the heat and allow it to cool for at least 30 minutes so that the fruit is well dispersed throughout the liquid.
- Place the marmalade in the hot, clean jars and firmly lid. Wash the jars and, when dry and cool, label.
My Tips:
Principles.
Dividing the work into separate stages (perhaps a morning, evening and following morning) makes the marmalade easier and ingredients (fruit, pulp and pips, juice, cooking water etc) can all be stored in lidded containers in the fridge between stages.
Cutting orange skin once cooked is much easier.
Using the fruit juice and heating as little as possible keeps fresh, zingy flavour.
Reducing the cooking liquid speeds evaporation and setting point.
Avoiding muslin bags of pulp and pips reduces mess.
Weights.
The amounts in this recipe are enough for the usual large preserving pan.
Broadly, the weight of the sugar and liquid (cooking water plus juice) are each three-quarters of the fruit weight.
For example, this recipe uses 2500g fruit, 1875 liquid (1080 juice plus 800g cooking water) and 1875g sugar to produce around 3.5kg marmalade.
Setting point.
The target temperature of jams and marmalades is allegedly between 104C and 105.5C. But, temperatures vary in a pan of madly bubbling fruit, sugar and liquid. In most cases, getting some of the mix to 106C is a good test.
Physically testing the set is helpful. A plate chilled in the fridge or freezer can be used but a clean, dry stainless steel draining board conducts the heat away quickly, offers more testing space and is easy to clean. To test: allow a teaspoonful of the mix to cool. Push a fingertip through the mix . If the fingertip creates a small “bow wave” of wrinkles and leaves a trail in the mix, the marmalade is done.
If not, continue cooking over a moderate heat and repeat the temperature and fingertip tests.
Equipment.
I use a large, heavy old-fashioned brass preserving pan which sits firmly on the hob and has a large surface area to aid evaporation.
An electric juicer rather than the classic hand-draulic model is easier.
A well-fitting jam funnel makes potting up easier.

